The Anatomy of a Dental Instrument: From Handle to Working Tip
The Anatomy of a Dental Instrument: Understanding Components from Handle to Working Tip for Precision and Ergonomics
Dental instrument anatomy refers to the structural components—handle, shank, and working end—that determine an instrument’s function, ergonomics, and clinical precision. Understanding these elements helps clinicians select appropriate tools for access, adaptation, and patient safety while also supporting reduced fatigue and improved procedural outcomes.
This article outlines each major component, explains how geometry and material selection influence performance, and highlights key considerations when choosing instruments for restorative, periodontal, endodontic, and surgical applications. It then expands into handle ergonomics, shank geometry, working-end variations, and material science, with a focus on medical grade stainless steel such as German stainless steel and its relevance to durability and sterilization performance.
Attention is also given to precision manufacturing and quality systems, including standards such as ISO 13485 and regulatory frameworks like Health Canada’s MDEL, which are commonly associated with controlled production, traceability, and consistency in medical device manufacturing. Lenox Instruments is referenced as an example of a manufacturer operating within these quality and material standards to support procurement and reliability context.
The following sections provide practical selection guidance, comparison tables, and actionable insights to help match instrument anatomy to clinical requirements.
What Are the Main Parts of a Dental Instrument? An Overview of Handle, Shank, and Working End
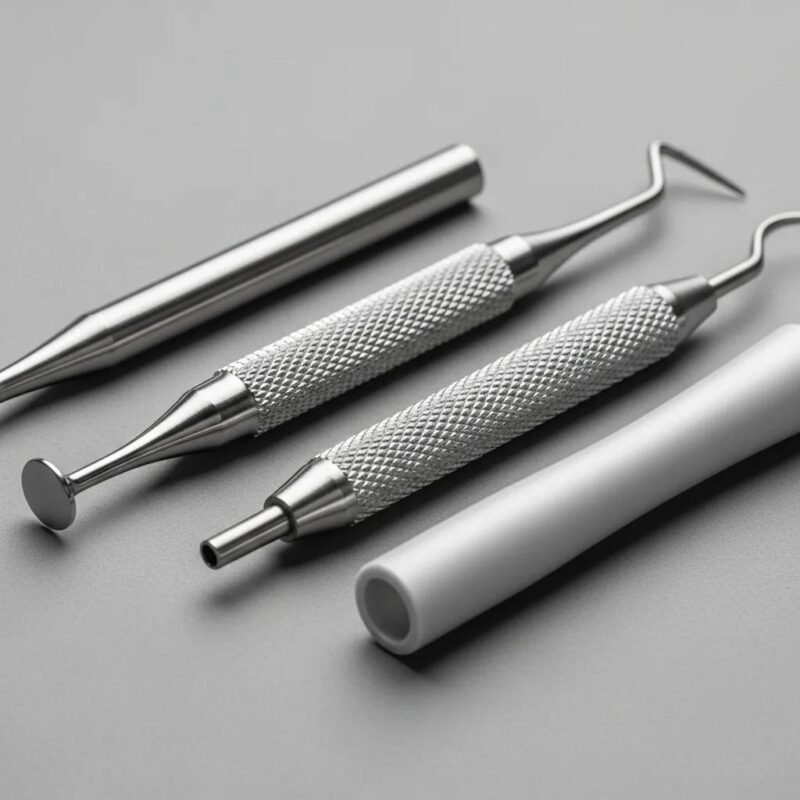
A dental instrument is typically composed of three main parts: the handle for control, the shank for reach and angulation, and the working end for task-specific action. These three components work together to ensure clinical precision, efficiency, and ergonomic handling.
The handle transmits clinician force and tactile feedback, supporting stable grip and controlled movement. The shank positions the working end in relation to oral anatomy, determining access and working angle. The working end performs the clinical function, such as cutting, scaling, probing, or other specialized procedures.
Clear understanding of this terminology is essential for proper instrument selection, maintenance, and adaptation to different clinical situations. The following section provides a concise breakdown of each component in an itemized format for quick reference.
The three canonical parts of a dental instrument are:
- Handle: The grip portion that transmits tactile sensation and torque control.
- Shank: The segment that orients and reaches the working end into the mouth.
- Working end: The blade, tip, toe, or nib that performs the clinical task.
Understanding these components allows clinicians to match instrument geometry to specific procedural requirements. This foundation supports more informed selection of instruments based on access needs, control demands, and the type of clinical task being performed.
Each part of the instrument contributes differently to overall function and handling. The handle influences grip and control, the shank determines reach and angulation, and the working end defines the precision and effectiveness of the clinical action. Evaluating how these elements interact helps clinicians choose instruments that offer the right balance of accessibility, efficiency, and safety for each procedure.
This understanding naturally leads to a closer examination of how each component contributes individually to instrument function and clinical control.
How Does Each Part Contribute to Instrument Function and Control?
The handle primarily controls grip, torque, and tactile feedback, enabling precise motion and force modulation during clinical procedures. A properly sized handle reduces gripping force and enhances fine motor control, directly contributing to improved clinical outcomes such as conservative tooth preparation and controlled subgingival scaling.
The shank determines access and angulation. Its length and curvature define whether the working end can effectively reach posterior teeth or subgingival pockets while maintaining the correct working angle for efficient performance.
The working end performs the actual clinical action: sharp cutting edges remove deposits such as calculus, while blunt or rounded tips allow probing and tissue assessment without causing trauma. Its microgeometry directly influences efficiency, safety, and maintenance requirements.
Understanding how these three components interact provides a foundation for evaluating handle ergonomics and its impact on clinician comfort and procedural precision.
What Are Common Terms and Synonyms for Dental Instrument Components?
Terminology for instrument components can vary across specialties and manufacturers, making a concise glossary useful for ensuring consistent communication in both procurement and clinical practice. Common synonyms include working end (tip, blade, toe, or nib), shank (also referred to as stem or neck in some contexts), and handle (often described as grip or barrel).
Many manufacturers also use product family names—such as Gracey curettes—that implicitly reference specific working-end designs and shank angulations. Understanding how these naming conventions translate into underlying geometry helps clinicians select instruments that best match procedural requirements.
Clear and standardized terminology also supports proper maintenance guidance, such as sharpening the cutting edge while preserving the toe, and improves alignment between instrument selection and clinical tasks like supragingival scaling or restorative excavation. With terminology established, the next section focuses on how handle design influences ergonomics and clinician comfort.
How Are Dental Instrument Handles Designed for Ergonomics and Professional Comfort?
Handle design balances diameter, weight, texture, and material to optimize grip, reduce muscular strain, and preserve tactile sensitivity during long clinical procedures. A well-designed handle increases contact area, reduces pinch force, and improves torque control, which collectively enhances precision and helps minimize clinician fatigue.
Manufacturers use different handle cross-sections such as round, hexagonal, and oval, along with surface treatments like knurling or grooved patterns to modify grip behavior. Some designs also incorporate sleeves or coatings to improve comfort and control, though these choices may influence sterilization requirements and long-term durability.
The selection of an appropriate handle type depends on balancing ergonomics, hygiene standards, and instrument lifecycle performance. The following table compares common handle designs and their ergonomic characteristics to support informed decision-making in clinical settings.
Common handle types and ergonomic attributes are summarized here:
| Handle Type | Diameter / Material | Texture |
|---|---|---|
| Thin round | 6–7 mm / stainless steel | Smooth or light knurling |
| Standard barrel | 8–10 mm / medical-grade stainless steel | Pronounced knurling or nurling |
| Lightweight hollow | 7–8 mm / hollow stainless steel | Fine knurling or silicone sleeve |
What Materials and Grip Textures Enhance Handle Performance?
Materials and surface textures significantly influence tactile feedback, sterilization compatibility, and long term durability in clinical instrument handles. Medical grade stainless steel provides high strength, corrosion resistance, and full compatibility with repeated autoclaving, making it a durable option for long term use. Silicone sleeves can enhance immediate comfort and slip resistance, but they require appropriate sterilization protocols and may introduce additional maintenance considerations.
Surface texturing such as knurling or finely patterned grips increases friction, particularly when instruments are used with gloves in wet conditions. These micro textures also enhance tactile feedback by improving grip stability and allowing more controlled micro adjustments during delicate procedures.
Selecting an appropriate combination of materials and textures involves balancing grip performance, hygiene requirements, and instrument lifecycle durability. These design choices ultimately contribute to reduced clinician fatigue and improved precision, reinforcing the importance of ergonomic handle design in overall instrument performance.
How Does Handle Design Reduce Clinician Fatigue and Improve Precision?
Ergonomic handle design helps reduce the muscular effort required to stabilize instruments, supporting improved control and lowering the risk of fatigue during long clinical procedures. By increasing handle diameter up to an optimal range, force is distributed across a larger surface area of the hand, which reduces pinch pressure and helps maintain steadier control. Balance and weight distribution also play an important role in supporting neutral wrist positioning and minimizing micro-adjustments during use.
Surface texture and material finishing contribute to grip stability without requiring excessive gripping force, helping preserve tactile sensitivity during precise procedures such as root instrumentation and margin finishing. These ergonomic considerations collectively support clinician comfort, efficiency, and accuracy over extended working periods.
Understanding these principles also assists clinicians in selecting shank geometries that work in harmony with handle design, ensuring optimal access, control, and procedural performance.
What Is the Role of the Shank in Dental Instruments? Functional and Terminal Shank Explained
The shank connects the handle to the working end and defines reach, angulation, and mechanical leverage. Its geometry directly influences access to anterior and posterior teeth as well as supragingival and subgingival areas.
The functional shank is the portion between the handle and the working end that provides the necessary bends and length for clinical access. In contrast, the terminal shank is the final straight segment near the working end that determines the blade’s precise orientation relative to the tooth surface.
Understanding these differences helps clinicians select instruments with the appropriate combination of shank length and angulation for specific procedures. The following table outlines common shank types and their typical clinical applications.
| Shank Type | Length / Angulation | Intended Use |
|---|---|---|
| Short, straight | Short / 0–15° | Anterior access, direct visualization |
| Medium, angled | Medium / 30–45° | Premolar/posterior crowns, supragingival scaling |
| Long, multi-bend | Long / 45–90° | Subgingival posterior access, deep pockets |
How Do Shank Length and Angulation Affect Access and Adaptation?
Shank length and angulation play a key role in determining the approach path and working angle at the tooth surface, directly affecting how effectively the working end can be adapted without causing wrist strain or excessive instrument repositioning. Longer shanks improve access to posterior and subgingival areas but may reduce tactile sensitivity and require greater wrist stabilization. In contrast, shorter shanks offer enhanced control and feedback, particularly in anterior regions, but may limit reach in deeper or less accessible sites.
Angulation provides the necessary offset to reach otherwise difficult areas. For example, a 45-degree bend can help achieve an optimal blade-to-tooth relationship during subgingival scaling while supporting a more neutral and ergonomic wrist position. As a result, clinicians must carefully balance reach, tactile sensitivity, and ergonomic comfort when selecting shank configurations.
This understanding naturally leads to a comparison between functional and terminal shanks, highlighting how each contributes differently to instrument performance and clinical precision.
What Are the Differences Between Functional Shank and Terminal Shank?
Functional shank and terminal shank are distinct but complementary components of an instrument’s design. The functional shank includes bends and length variations that provide access, adaptability, and leverage within the oral cavity, while the terminal shank is the shorter segment that precisely positions the working end at the required angle for effective cutting or adaptation.
The functional shank primarily determines reach and overall positioning, whereas the terminal shank fine-tunes the orientation of the working end to support accurate stroke mechanics. For instance, scalers often incorporate multiple bends in the functional shank to improve posterior access, while curettes use a specifically angled terminal shank to ensure correct toe placement for subgingival debridement.
Understanding these structural roles helps clinicians select appropriate instrument families—such as scalers, curettes, and explorers—based on procedural requirements, improving both efficiency and clinical safety.
How Do Working Ends Vary Among Dental Instruments? Exploring Blades, Tips, and Nibs
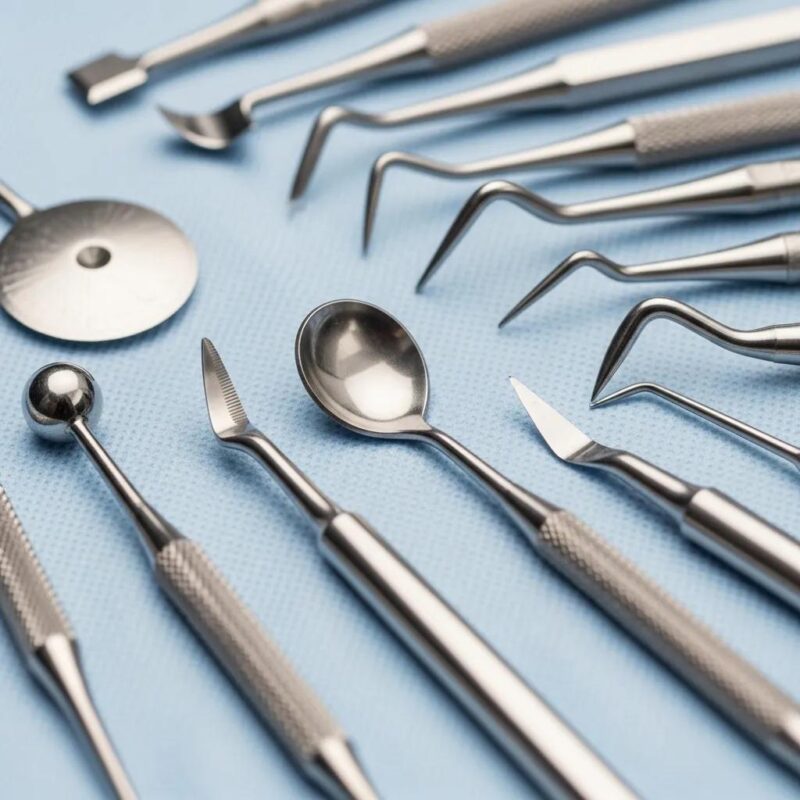
Working ends are categorized based on their functional action, including cutting edges, non-cutting tips, toes, blades, and nibs. Their microgeometry plays a critical role in determining efficiency, tissue interaction, and maintenance requirements. Cutting edges are designed with precise bevels and angles to enable effective calculus removal or restorative cutting, while rounded toes and non-cutting tips provide atraumatic contact for probing, assessment, and curettage.
Different instrument families—such as scalers, curettes, excavators, and explorers—utilize distinct working-end geometries tailored to specific clinical objectives. These include supragingival scaling, root planing, caries removal, and tactile exploration. Understanding these design differences helps clinicians select instruments that best match procedural requirements and ensure optimal clinical performance.
The following section outlines the major working-end categories along with their typical clinical applications to support informed instrument selection.
Working-end families and typical uses include:
- Cutting edges (scalers, excavators): remove hard deposits or carious tissue with sharp bevels.
- Blades with toes (curettes): adapt to root anatomy for subgingival debridement with rounded tips.
- Non-cutting tips (explorers, probes): detect irregularities and measure pocket depth without cutting.
What Are the Specific Features of Cutting and Non-Cutting Working Ends?
Cutting working ends are designed with a fine bevel and defined edge angle that delivers controlled shearing force for removing calculus or carious material. Key design factors such as edge thickness, bevel angle, and surface finish directly influence cutting efficiency, tactile feedback, and ease of sharpening.
Non-cutting working ends, such as rounded toes or blunt tips, are intended for atraumatic contact with tissues. They support probing, assessment, and repositioning without causing laceration, helping preserve soft tissue integrity when used appropriately.
Maintenance requirements differ between these designs. Cutting instruments require periodic honing and stropping to maintain sharpness and consistent performance, while non-cutting instruments require inspection for deformation or wear that may reduce accuracy or tactile sensitivity. Understanding these distinctions supports correct instrument selection and appropriate maintenance practices, ensuring both procedural efficiency and patient safety.
How Do Working End Designs Relate to Instrument Types Like Scalers and Curettes?
Design features of working ends correspond directly to instrument families and their clinical applications. Scalers typically feature triangular cross-section cutting edges for effective supragingival calculus removal, while curettes combine a rounded toe with one or two cutting edges to enable controlled subgingival scaling with reduced tissue trauma. Excavators, on the other hand, use spoon-shaped blades designed for efficient caries removal and material excavation.
These geometric differences define how force is applied during use. Scalers concentrate pressure along a fine cutting edge for efficient deposit removal, whereas curettes distribute force more evenly through a rounded toe to enhance safety and minimize soft tissue damage. As a result, instrument selection depends on clinical objectives, target tissue, access requirements, and the balance between precision and aggressiveness.
With working-end design clarified, material selection and stainless steel properties become essential factors in determining durability, corrosion resistance, and sterilization performance.
Why Is Material Science Critical in Dental Instrument Anatomy? The German Stainless Steel Advantage
Material selection plays a key role in determining corrosion resistance, hardness, passivation quality, and biocompatibility—factors that directly affect edge retention, sterilization durability, and surface finish, all of which contribute to clinical reliability. Medical grade stainless steel, particularly German stainless steel, is widely recognized for its strong corrosion resistance, stable hardness that supports precise edge geometry, and excellent finish quality.
These properties allow instruments to maintain sharpness, resist pitting, and retain structural integrity through repeated autoclave cycles. As a result, clinicians benefit from consistent performance, while procurement teams gain clearer benchmarks for evaluating long term value and product suitability across different instrument categories.
| Material | Property | Value |
|---|---|---|
| Medical-grade German stainless steel | Corrosion resistance | High (passivation-grade finish) |
| Standard surgical stainless steel | Hardness | Moderate (good for general use) |
| Coated alloys | Surface finish durability | Variable (may affect sharpening) |
What Properties Make Medical-Grade German Stainless Steel Ideal for Dental Tools?
Medical grade stainless steel offers a balance of tensile strength, controlled hardness, and surface properties that support passivation, helping form a protective oxide layer that improves corrosion resistance and maintains polished finishes. Its machinability allows for precise edge profiles and consistent shaping, which are important for achieving accurate working angles and reliable adaptation during clinical use.
The material’s ability to maintain sharpness over repeated use reduces the need for frequent sharpening and helps preserve cutting efficiency through multiple sterilization cycles. These characteristics contribute to predictable performance, reduced long term maintenance requirements, and clearer specification standards for procurement teams and healthcare professionals evaluating instrument quality and reliability.
How Does Material Choice Impact Durability, Sterilization, and Performance?
Material selection significantly influences instrument durability, corrosion resistance, and compatibility with repeated sterilization processes such as autoclaving. High quality medical grade stainless steels are designed to maintain surface integrity, edge stability, and structural strength even after repeated exposure to cleaning agents and high temperature sterilization cycles. In contrast, lower grade materials may be more prone to surface wear, discoloration, or reduced functional performance over time.
For buyers, evaluating material quality alongside manufacturing standards is essential to understanding long term value, consistency, and lifecycle performance. Factors such as edge retention, surface finish stability, and resistance to corrosion contribute directly to overall instrument reliability and usability in clinical settings.
Precision manufacturing and structured quality control processes ensure that design specifications are consistently met throughout production. These systems help maintain dimensional accuracy, functional performance, and product uniformity, supporting dependable outcomes across surgical, dental, and hospital hollowware instrument categories.
How Does Precision Manufacturing and Quality Control Enhance Dental Instrument Anatomy?
Precision manufacturing helps maintain consistent dimensions, alignment, and functional performance across instrument product lines. Controlled production processes, material verification, finishing procedures, and quality inspections contribute to product consistency, durability, and dependable handling characteristics. Careful attention to manufacturing details supports reliable instrument performance and helps ensure that products meet established quality requirements.
Comprehensive quality assurance systems and documented manufacturing procedures provide greater traceability and process transparency, giving distributors, healthcare providers, and procurement teams confidence in their sourcing decisions. These practices support consistency across production batches and contribute to long term product reliability.
The following section explores the quality standards, certifications, and regulatory frameworks commonly associated with medical device manufacturing and explains their importance in supporting quality management, traceability, and compliance within the healthcare industry.
Standards and regulatory frameworks affect manufacturing in these ways:
- Standards ensure process control and repeatability in manufacturing.
- Certifications provide external validation of quality management systems.
- Compliance improves buyer confidence by documenting traceability and regulatory oversight.
Understanding these frameworks helps buyers evaluate manufacturing capabilities, quality systems, and supplier claims more effectively. At Orasurge, our manufacturing approach is built around structured quality controls, documented production processes, material verification, and ongoing inspection procedures that support consistency, traceability, and reliable product performance. These practices align with the expectations of distributors, healthcare providers, and procurement teams seeking dependable long term manufacturing and supply partnerships.
What Are the Standards and Certifications Governing Dental Instrument Production?
Relevant standards and certifications focus on quality management, product traceability, and regulatory compliance. Quality management frameworks emphasize consistent manufacturing practices, risk management, process control, and continuous improvement to support reliable product performance.
Regulatory approvals and establishment licenses provide additional oversight of manufacturing, distribution, and supply chain activities, helping ensure that products are produced and supplied in accordance with applicable industry requirements. These standards are important because they support controlled production processes, supplier qualification, material verification, documentation management, and ongoing quality monitoring—factors that contribute to product reliability and user confidence.
At Orasurge, quality is integrated throughout the manufacturing process through structured quality controls, material inspection, production monitoring, product testing, and final verification procedures. This approach helps maintain consistency, traceability, and dependable performance across our surgical instruments, dental instruments, surgical sets, and hospital hollowware product lines.
How Does Orasurge Ensure Quality Through International Compliance and Quality Management Standards?
Orasurge maintains compliance with recognized quality management standards and applicable regulatory requirements, demonstrating a commitment to controlled manufacturing processes, product consistency, and traceability. These measures support quality assurance throughout production and help ensure that instrument specifications, material documentation, and performance requirements are managed within a structured and auditable framework.
For healthcare providers, distributors, and procurement teams, this commitment to quality helps support informed purchasing decisions, reliable inventory management, and confidence in product consistency. Our product range includes surgical instruments, dental instruments, surgical sets, and hospital hollowware, manufactured using high quality stainless steel and supported by strict process controls.
For organizations seeking dependable manufacturing partners, reviewing supplier quality systems, certifications, and product specifications can provide valuable assurance regarding product quality, reliability, and long term supply capability.